[iOS] Push Notification 구현하기 (1편 - Remote Notification과 APNs의 개념)
저번 글에서는 Remote Notification 기능을 구현하기 위한 용어와 APNs의 역할에 대해서 다루었다. 이번 글에서는 Provider Server를 FireBase Cloud Messaging 기능으로 대체하여 Push Notification을 실제로 구현해볼 것이다.
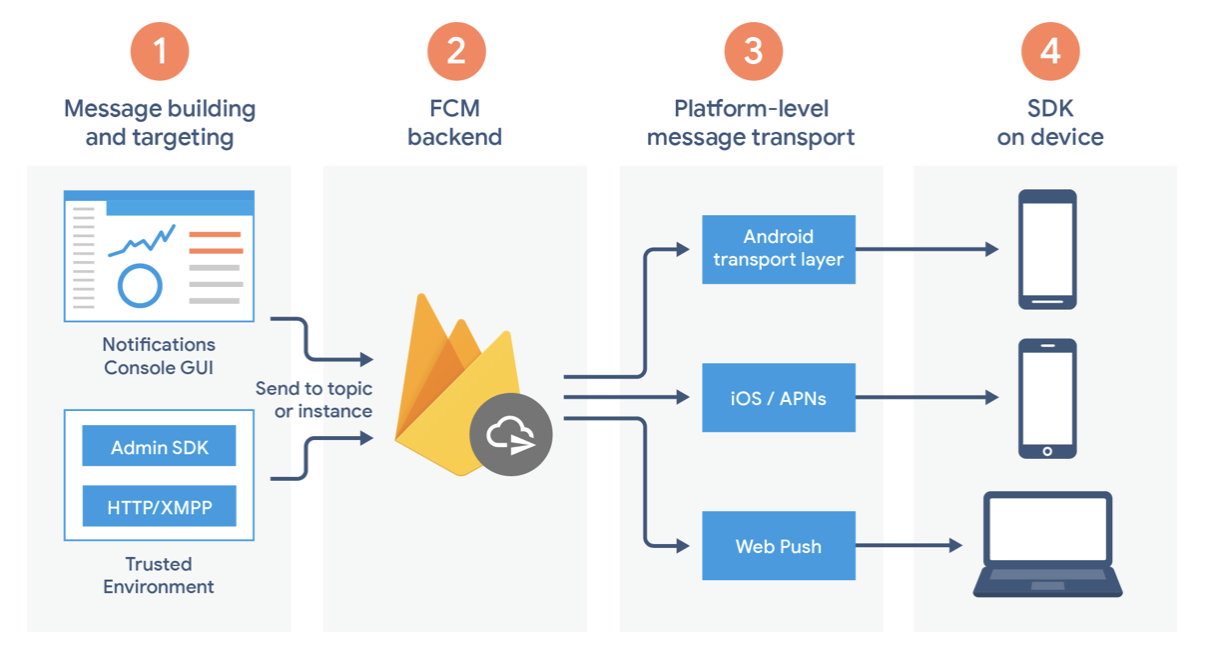
FireBase Cloud Messaging(이하 FCM)을 이용하는 가장 큰 이유는 콘솔을 통해서 보낼 메시지를 손쉽게 조작 가능하고, 원래는 자체 Server에서 해야할 일을 간편하게 처리해준다는 점에 있다. 위의 그림에서 볼 수 있듯이 비개발자도 콘솔을 통해 보낼 메시지를 관리하고, 스케줄링 할 수 있으며 이러한 일들을 FCM backend에서 Code 수준으로 처리해주며, 처리된 내용을 각 플랫폼에(iOS의 경우 APNs) 전달해준다.
1. FireBase Project 생성하기
먼저 FCM을 등록하려는 Xcode 프로젝트의 번들아이디를 복사해 놓은 다음, FireBase 프로젝트를 하나 추가해준다.

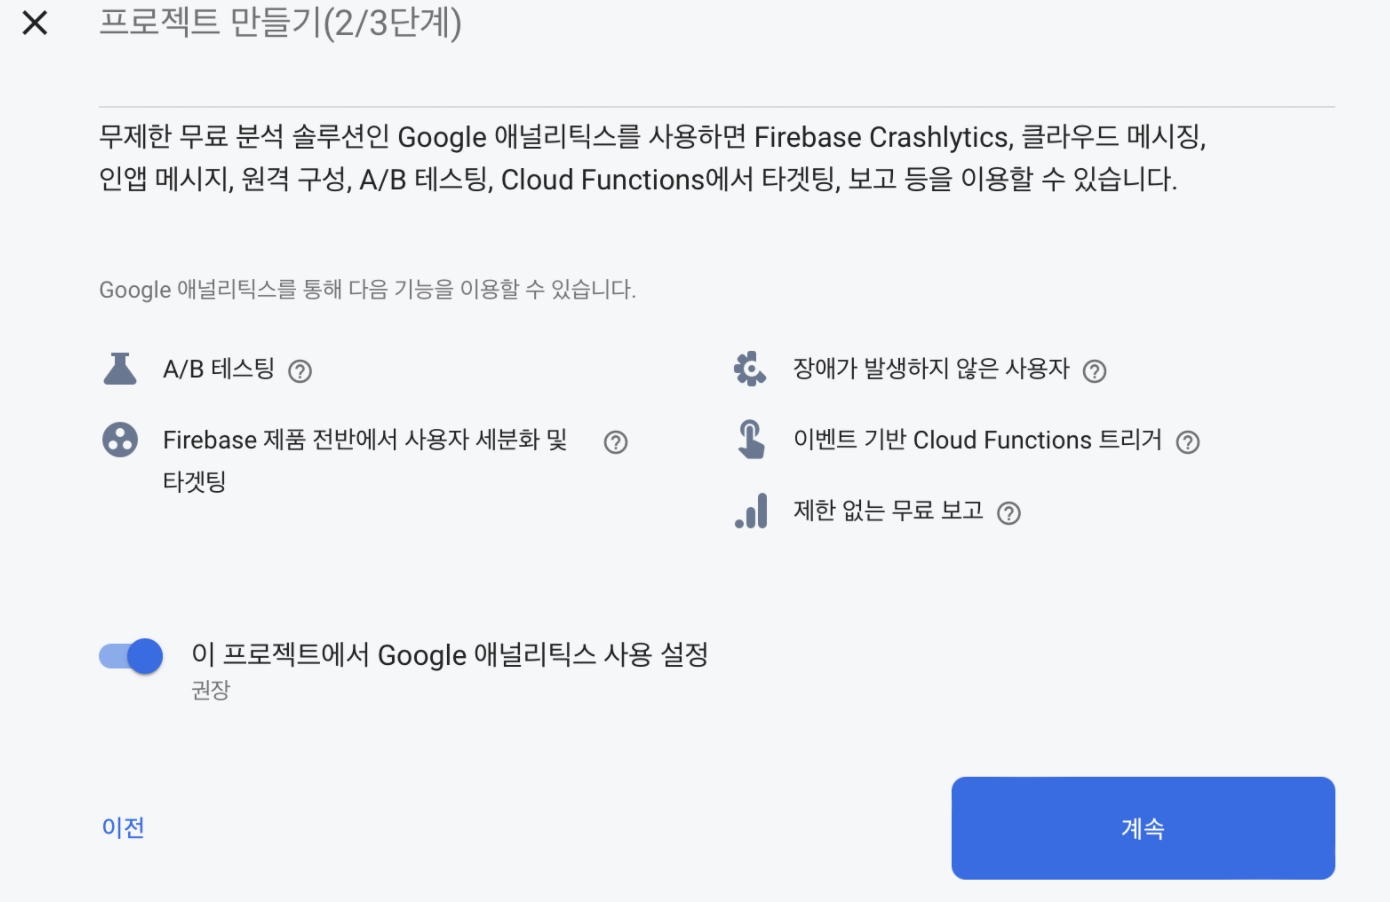
프로젝트를 생성하는 과정에서 구글 애널리틱스는 사용하는 것으로 설정해야 한다. 아래 이미지에 설명되어 있듯이 클라우드 메시징 기능을 이용하기 위해 필요한 권한이다.
2. 프로젝트 콘솔로 들어가서 iOS 앱을 추가해준다
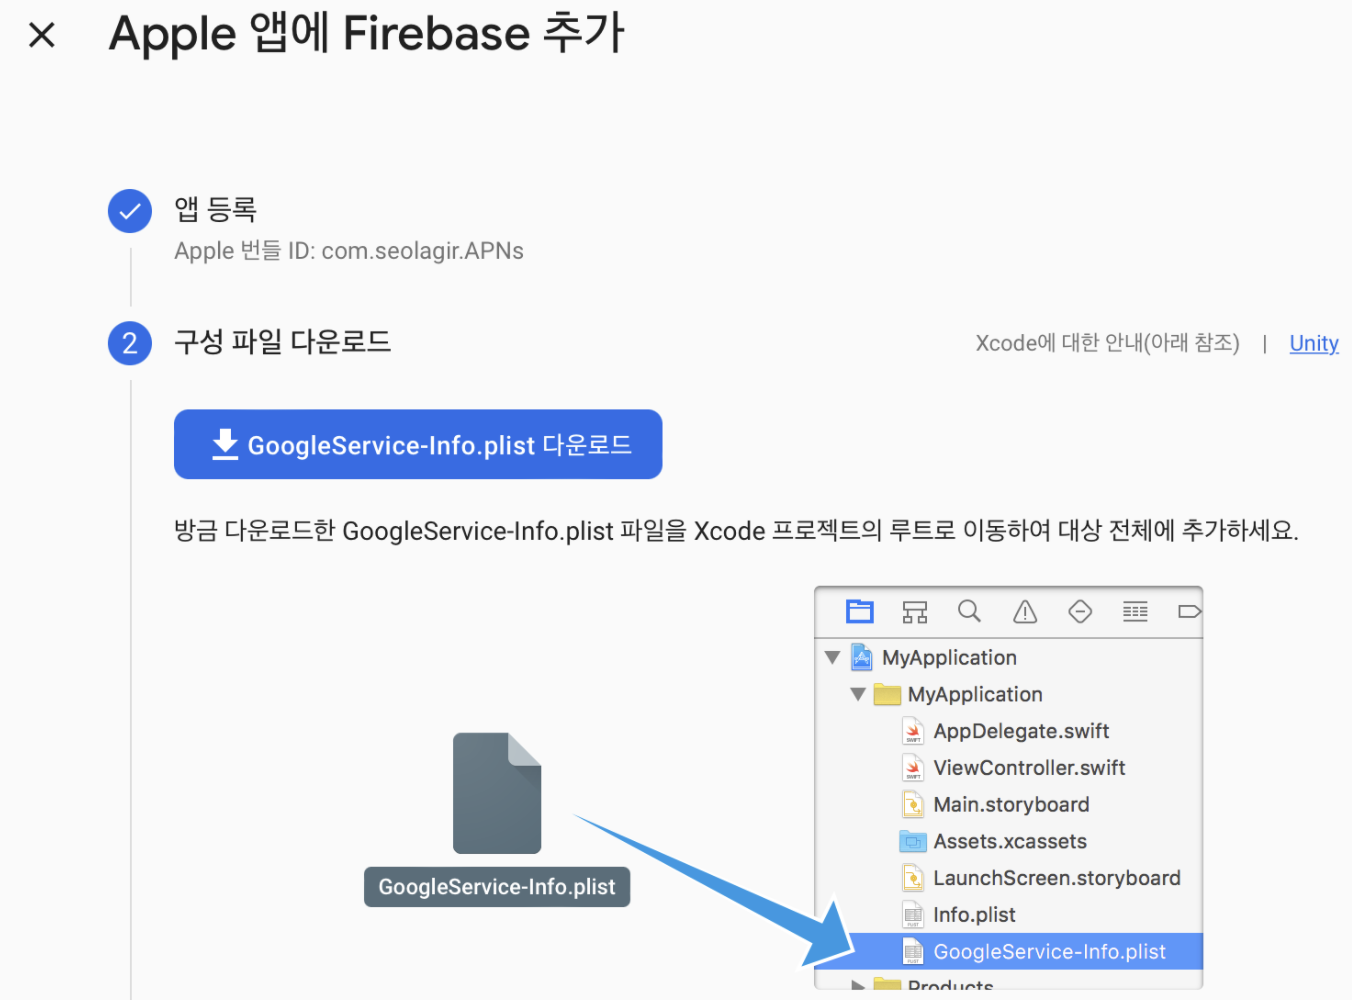
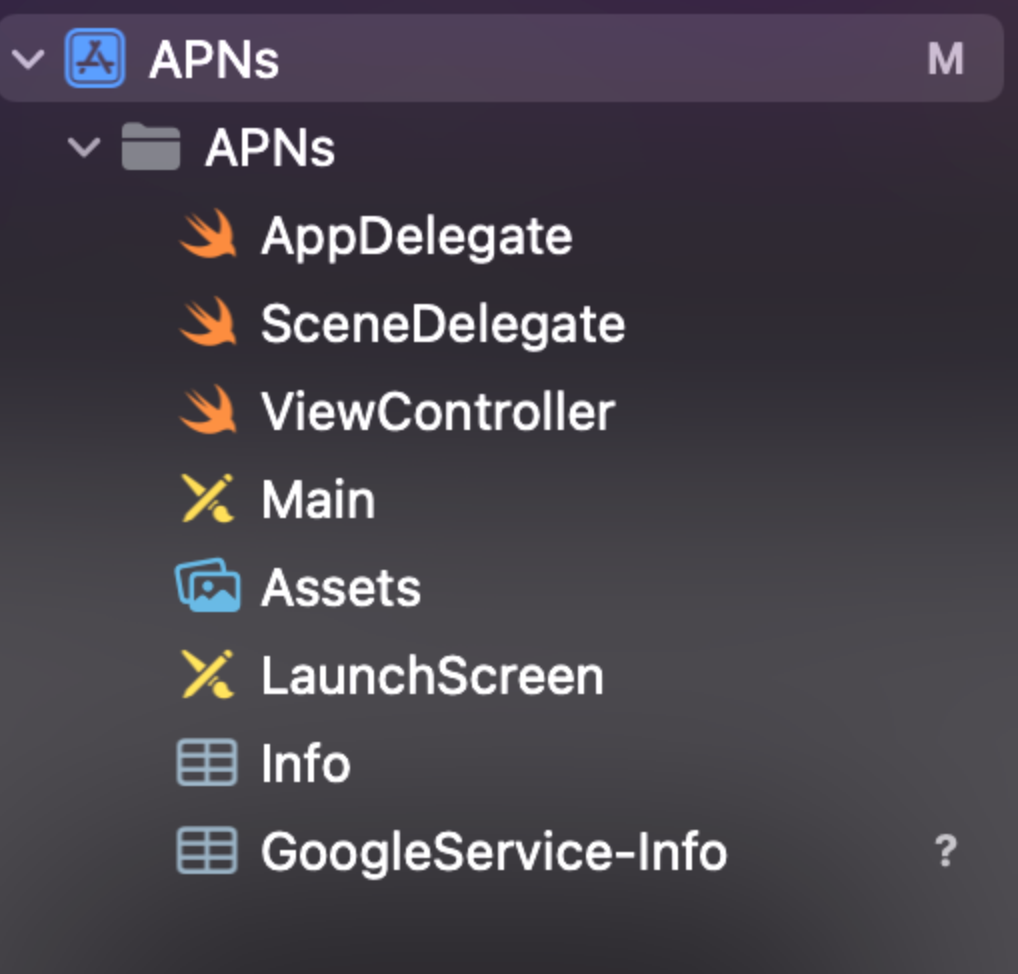
콘솔 창에서 iOS 앱 추가하기를 선택하면 앞에서 복사해놓은 번들 ID를 등록하는 화면이 나온다. ID를 입력하고 다음을 누르면 GoogleService-info.plist를 다운로드하여 프로젝트 경로에 옮기라는 안내가 나오는데, 그대로 수행해준다.
3. 프로젝트에 파이어베이스 아날리틱스 및 메시징 라이브러리 추가하기
라이브러리 의존성을 추가하는 방법은 여러가지가 있지만, 이번에는 CocoaPod을 이용했다. 프로젝트 경로에서 pod init 을 입력하고 podfile이 생성되면, 아래 사진과 같이 필요한 라이브러리들을 추가해준다.
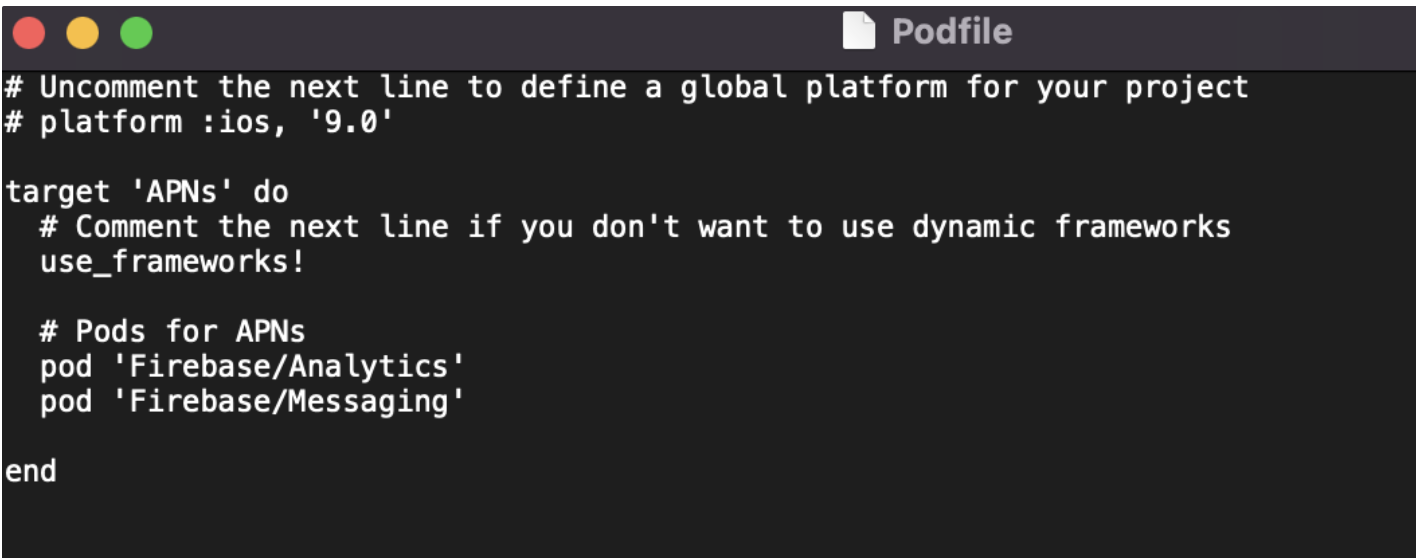
FCM에 필요한 의존성은 Firebase/Analytics와 Firebase/Messaging이다. 저장한 다음에 터미널에서 pod install 하여 라이브러리를 설치해주고, 생성된 xcworkspace파일로 프로젝트를 다시 열어준다.
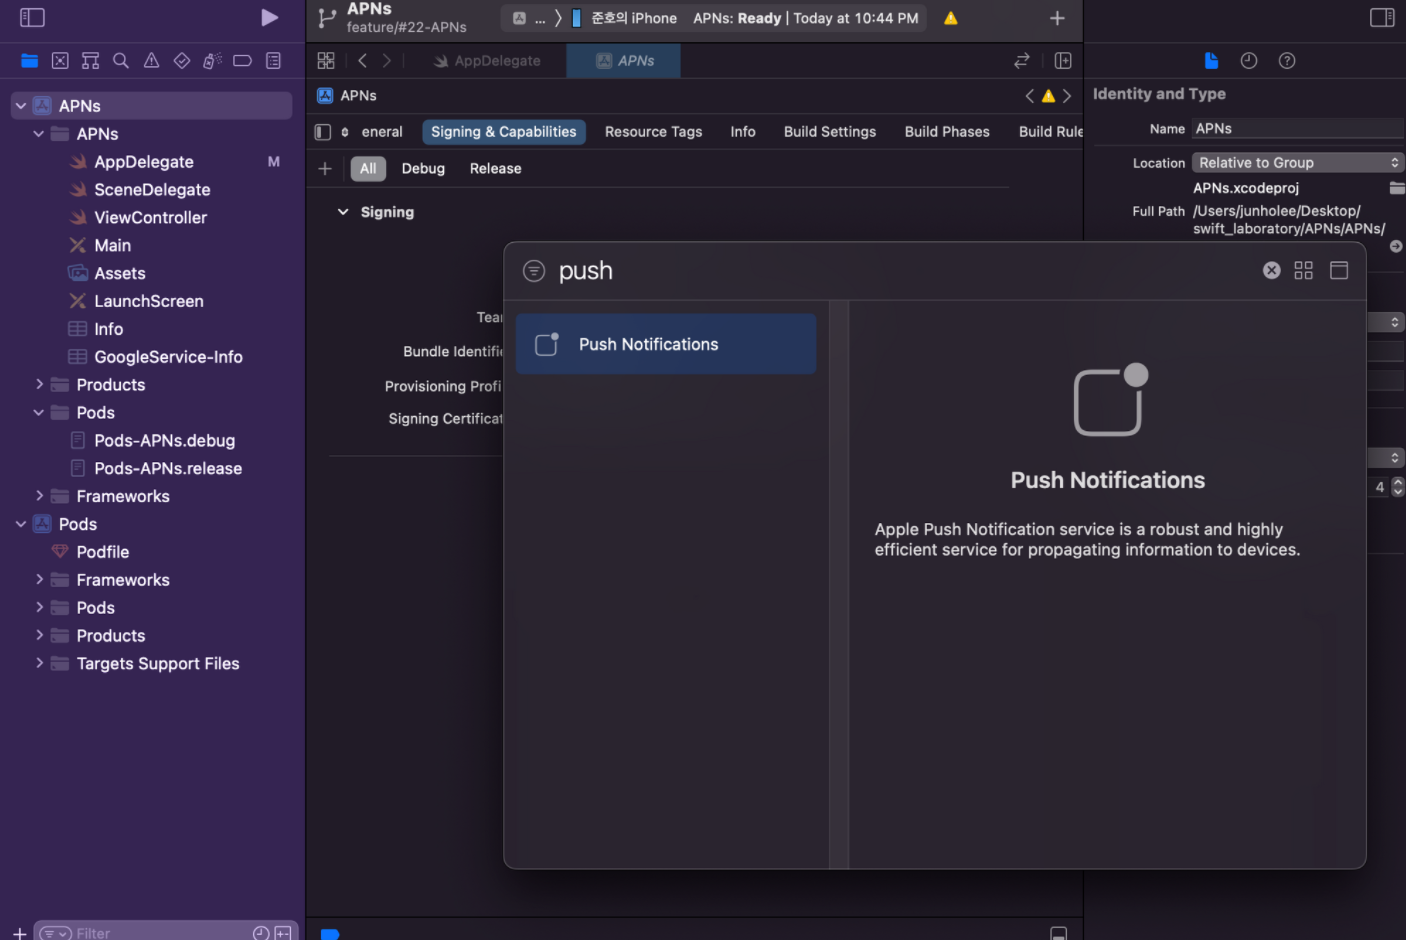
4. 프로젝트에서 Push Notifications 기능 Signing하기
앱이 원격 알림을 받기 위해서는 APNs에 앱을 등록해야 한다고 했다. 아래와 같이 project에서 push notification에 대한 certificate를 생성할 수 있다.
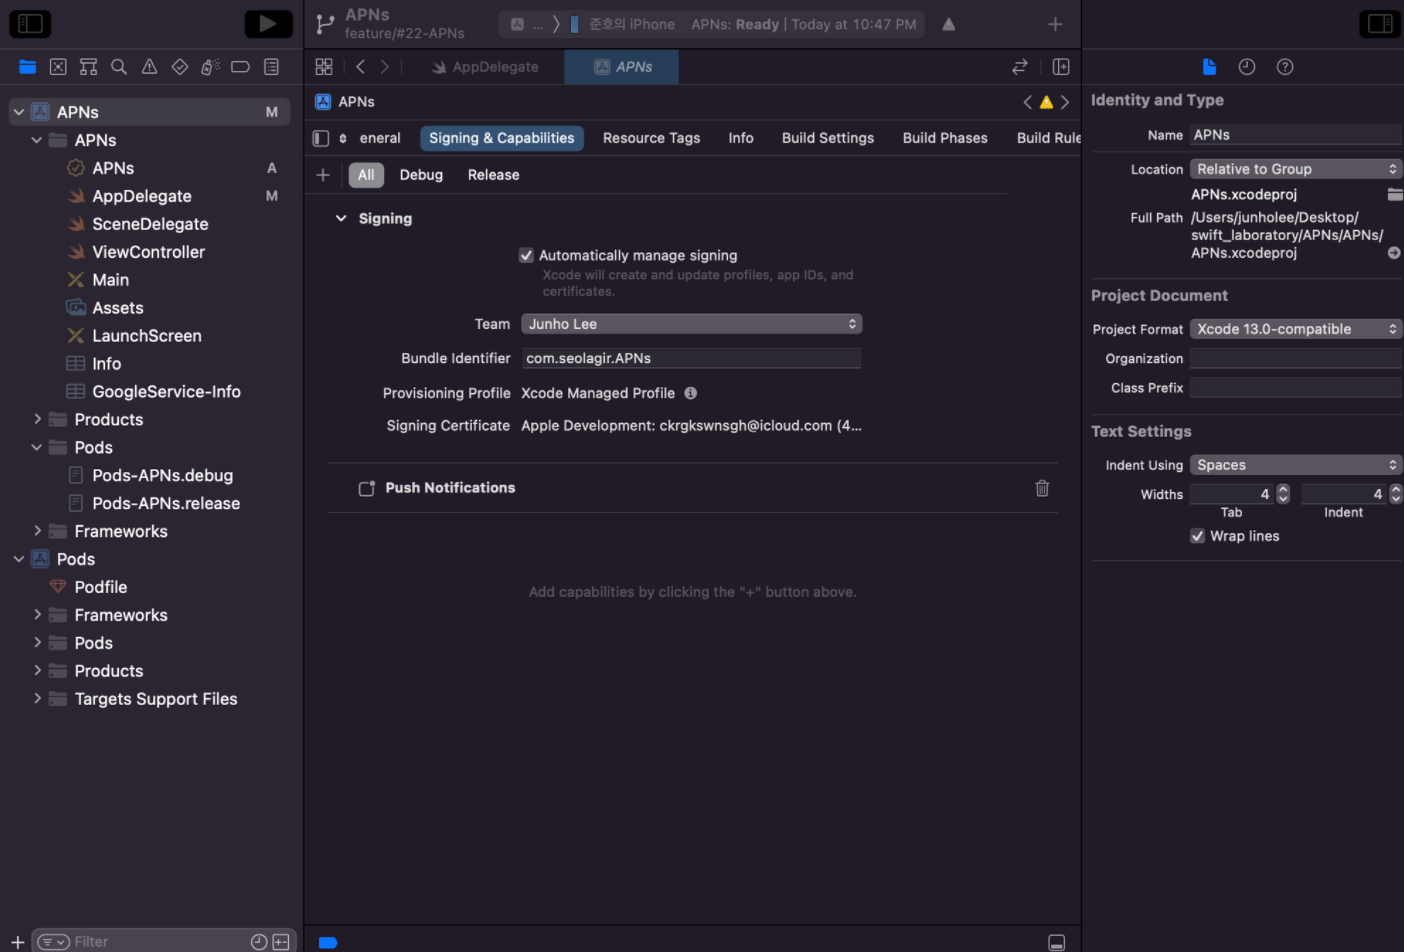
바로 위 사진은 Signing Certificate가 생성된 모습이다.
5. APN 인증 키 생성하기
여기까지 했으면 다음으로는 Apple Developers 홈페이지에서 APN 인증 키를 받아와야 한다. 아래에서 Certificates, Identifiers & Profiles를 선택해준다.
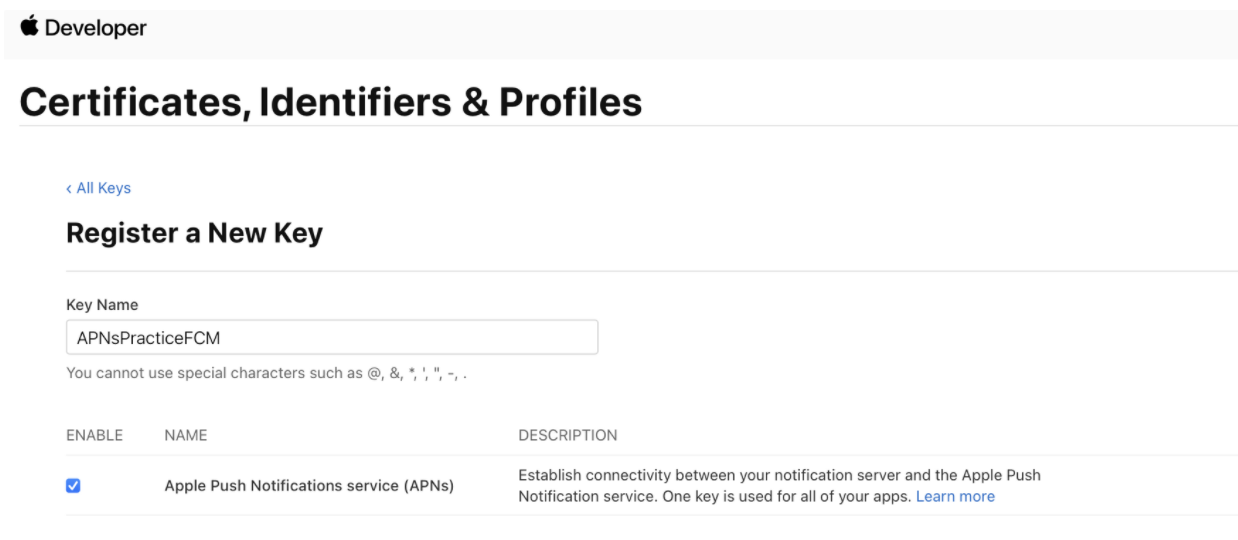
APNs에 대한 Key를 받아와야 하기 때문에 APNs에 체크해주고, 원하는 키 네임을 입력한 다음에 Continue하고, Register까지 해준다.
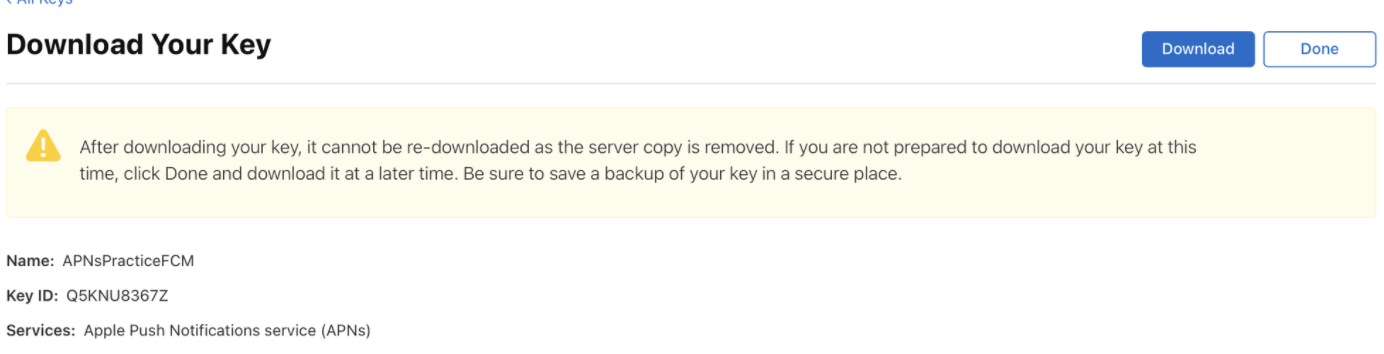
그러면 아래와 같이 키를 다운로드하라고 나오는데, 다운로드해서 잘 보관한 다음에, 아래에 있는 Key ID도 복사해 준다. 이 정보들은 나중에 FCM에 등록해야 한다.
6. FireBase Project Setting에 APN 인증 키 등록하기
5번에서 APN에 접근할 수 있는 Key를 가져왔으니, 이를 메시지를 보낼 주체인 FireBase Project에 등록해줘야 FCM이 APNs에 대한 권한을 얻을 수 있다. 프로젝트 설정 - Cloud messaging에서 APN 인증 키를 등록해준다.
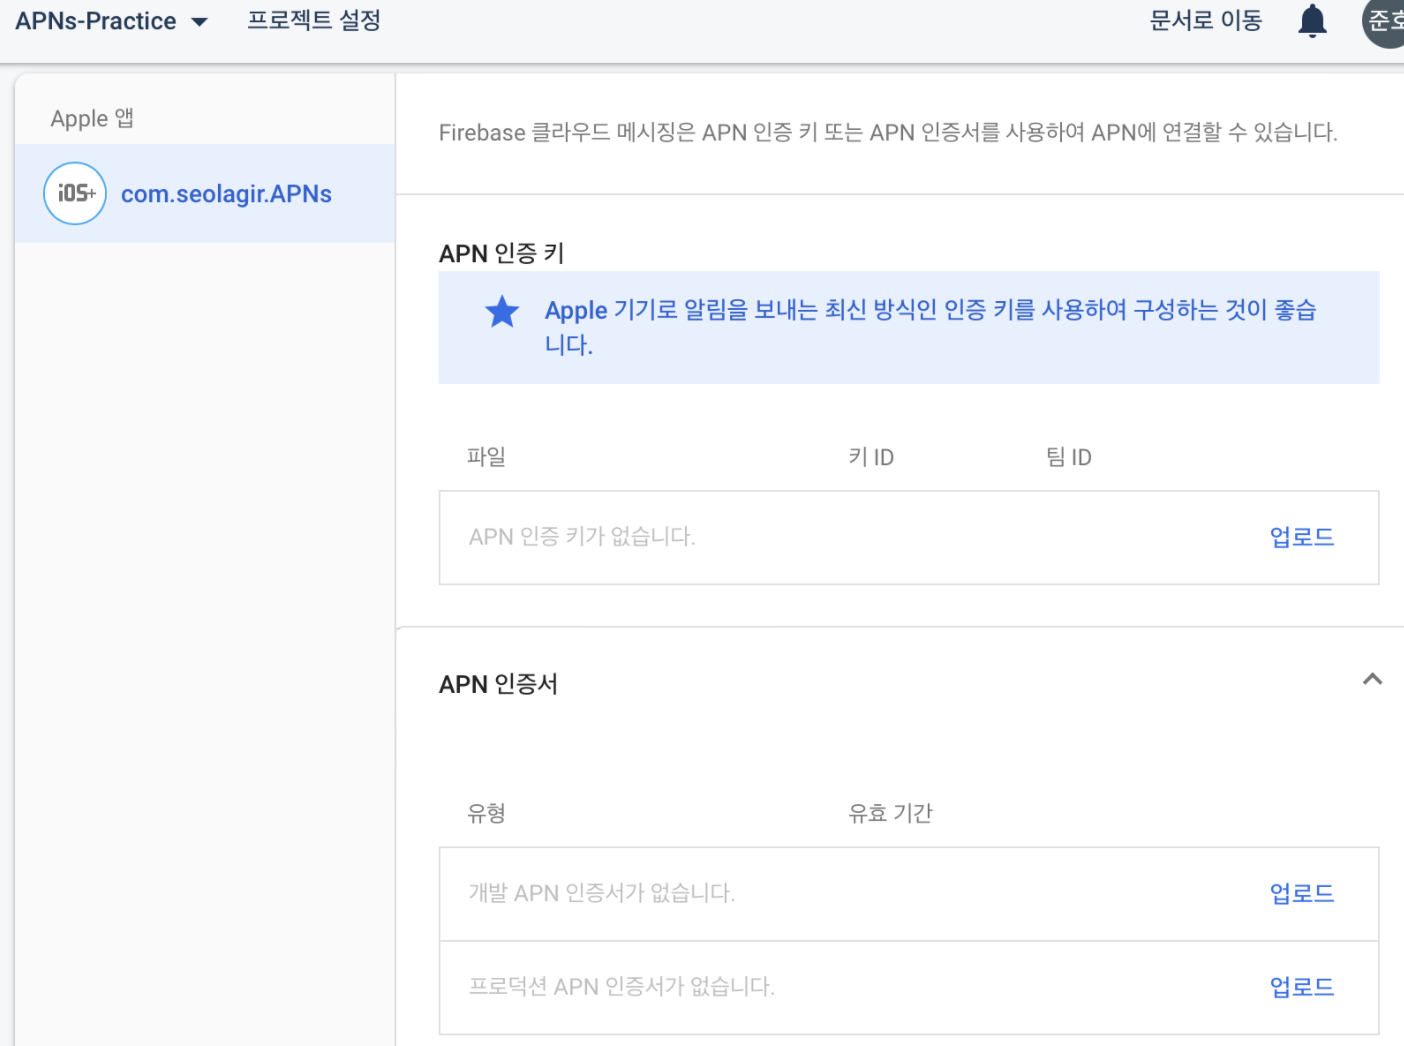
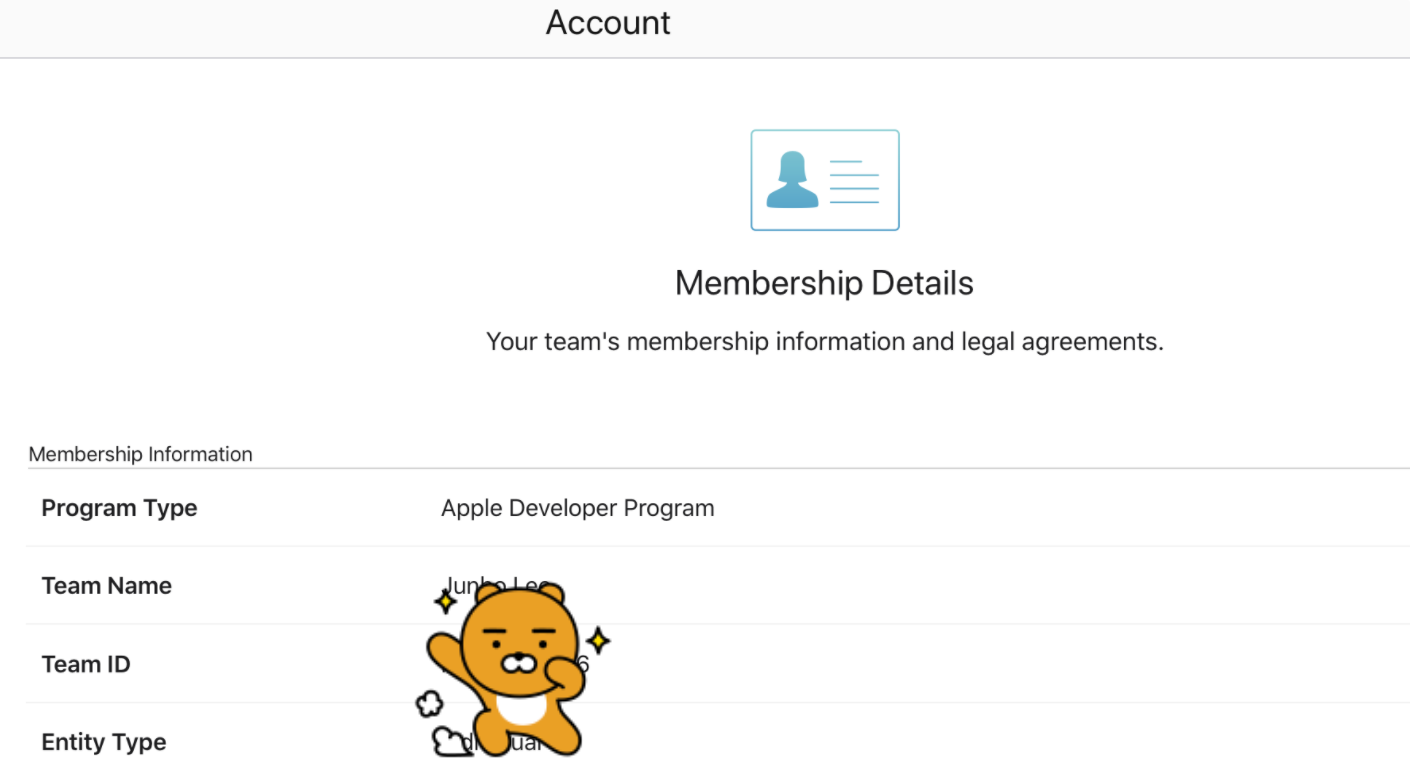
위 사진에서 'APN 인증 키' 부분의 업로드를 클릭하면 아까 다운받은 키 파일과 키 ID, 팀 ID를 요구한다. 팀 ID는 다시 Developer 홈페이지에서 확인할 수 있다.
여기까지 하면 FCM과 APNs 간의 연결 작업은 끝났다. FCM에서 APNs에 메시지를 보낼 권한을 얻은 것이다. 이제 남은 일은 클라이언트에서 디바이스 토큰을 받아오고, 알림에 대한 처리를 하는 작업이다.
7. AppDelegate에서 알림 권한 요청, 알림 후처리, APNs 등록, FCM 토큰
거의 모든 작업이 AppDelegate에서 이루어진다. 뷰컨트롤러에서 해줘도 되는 부분들이 물론 존재하지만, 편의를 위해 아래와 같이 구성했다. 먼저 아래는 전체 코드를 보고, 두 부분으로 나눠서 설명하겠다.
import UIKit
import Firebase
import FirebaseMessaging
import UserNotifications

@main
class AppDelegate: UIResponder, UIApplicationDelegate {

    func application(_ application: UIApplication, willFinishLaunchingWithOptions launchOptions: [UIApplication.LaunchOptionsKey : Any]? = nil) -> Bool {
        UNUserNotificationCenter.current().delegate = self
        return true
    }

    func application(_ application: UIApplication, didFinishLaunchingWithOptions launchOptions: [UIApplication.LaunchOptionsKey: Any]?) -> Bool {
        FirebaseApp.configure()

        Messaging.messaging().delegate = self

        Messaging.messaging().token { token, error in
            if let error = error {
                print("FCM 등록토큰 가져오기 오류")
            } else if let token = token {
                print("FCM 등록토큰 : \(token)")
            }
        }

        let authOptions: UNAuthorizationOptions = [.alert, .badge, .sound]
        UNUserNotificationCenter.current().requestAuthorization(options: authOptions) { _, error in
            if let error = error {
                print("Error 발생: 알림 권한 요청")
            }
        }

        application.registerForRemoteNotifications()

        return true
    }

    // MARK: UISceneSession Lifecycle

    func application(_ application: UIApplication, configurationForConnecting connectingSceneSession: UISceneSession, options: UIScene.ConnectionOptions) -> UISceneConfiguration {
        return UISceneConfiguration(name: "Default Configuration", sessionRole: connectingSceneSession.role)
    }

    func application(_ application: UIApplication, didDiscardSceneSessions sceneSessions: Set<UISceneSession>) {
    }


}

extension AppDelegate: UNUserNotificationCenterDelegate {
    func userNotificationCenter(_ center: UNUserNotificationCenter, willPresent notification: UNNotification, withCompletionHandler completionHandler: @escaping (UNNotificationPresentationOptions) -> Void) {
        completionHandler([.list, .badge, .sound, .banner])
    }

}

extension AppDelegate: MessagingDelegate {
    func messaging(_ messaging: Messaging, didReceiveRegistrationToken fcmToken: String?) {
        guard let token = fcmToken else { return }
        print("FCM 등록토큰 갱신: \(token)")
    }
}
7.1 알림 권한 설정, 알림 도착후 처리 설정
func application(_ application: UIApplication, willFinishLaunchingWithOptions launchOptions: [UIApplication.LaunchOptionsKey : Any]? = nil) -> Bool {
    UNUserNotificationCenter.current().delegate = self
    return true
}

func application(_ application: UIApplication, didFinishLaunchingWithOptions launchOptions: [UIApplication.LaunchOptionsKey: Any]?) -> Bool {

    let authOptions: UNAuthorizationOptions = [.alert, .badge, .sound]
    UNUserNotificationCenter.current().requestAuthorization(options: authOptions) { _, error in
        if let error = error {
            print("Error 발생: 알림 권한 요청")
        }
    }

    return true
}

extension AppDelegate: UNUserNotificationCenterDelegate {
    func userNotificationCenter(_ center: UNUserNotificationCenter, willPresent notification: UNNotification, withCompletionHandler completionHandler: @escaping (UNNotificationPresentationOptions) -> Void) {
        completionHandler([.list, .badge, .sound, .banner])
    }
}
UNUserNotificationCenter.current().delegate = self : delegate를 applcation에게 넘겨준다.
requestAuthorization() : 유저에게 알림 권한을 요청한다. 한번 거절되면 더이상 권한을 요청하지 않는다. 따라서 유저가 설정 - 앱 설정에서 권한을 허용해야 한다.
application.registerForRemoteNotifications() : APNs를 사용하기 위한 registration process를 시작한다. 등록이 성공하면 application(_:didRegisterForRemoteNotificationsWithDeviceToken:) 메서드가 실행되는데, 여기서 device token에 접근할 수 있기 때문에 만약 FCM이 아니라 자체 서버를 사용한다면 여기서 토큰을 받아서 서버의 로그인 API에 전달하면 된다.
7.2 FCM 등록토큰 생성 및 갱신
기본적으로 FCM SDK는 앱을 시작할 때 클라이언트 앱 인스턴스의 등록 토큰을 생성합니다. APN 기기 토큰과 마찬가지로 이 토큰을 사용하여 타겟팅된 알림을 앱의 모든 특정 인스턴스로 전송할 수 있습니다. Apple 플랫폼이 일반적으로 앱 시작 시 APN 기기 토큰을 전달하는 것과 마찬가지로 FCM은 FIRMessagingDelegate의 messaging:didReceiveRegistrationToken:메서드를 통해 등록 토큰을 제공합니다. FCM SDK는 최초 앱 시작 시 그리고 토큰이 업데이트되거나 무효화될 때마다 신규 또는 기존 토큰을 가져옵니다. 어떠한 경우든 FCM SDK는 유효한 토큰이 있는 messaging:didReceiveRegistrationToken:을 호출합니다.
위는 파이어베이스 공식 문서의 설명이다. FCM SDK는 APN 기기 토큰이 앱 시작 시에 매번 토큰을 확인하고 전달하는 것처럼 새로운 토큰을 생성하거나 기존 토큰을 FCM에 등록한다는 것을 알 수 있다. 7-1의 registerForRemoteNotifications() 메서드와 비슷하다.
func application(_ application: UIApplication, didFinishLaunchingWithOptions launchOptions: [UIApplication.LaunchOptionsKey: Any]?) -> Bool {
    FirebaseApp.configure()

    Messaging.messaging().delegate = self

    Messaging.messaging().token { token, error in
        if let error = error {
            print("FCM 등록토큰 가져오기 오류")
        } else if let token = token {
            print("FCM 등록토큰 : \(token)")
        }
    }
    return true
}

extension AppDelegate: MessagingDelegate {
    func messaging(_ messaging: Messaging, didReceiveRegistrationToken fcmToken: String?) {
        guard let token = fcmToken else { return }
        print("FCM 등록토큰 갱신: \(token)")
    }
}
Firebase.configure : 파이어베이스 공유 인스턴스를 초기화한다. Firebase 객체가 생성되어 Firebase를 통해 할 수 있는 기능들을 사용할 수 있게 된다.
didFinishLaunchingwithOptions에서는 messaging의 delegate를 application 객체에 할당해준다. 이를 통해 , 현재 등록된 토큰이 있는지 확인한다.
Messaging.messaging().token() : FCM 토큰이 있는지 확인하고, 없으면 새로 생성한다. print를 통해 토큰을 알 수 있다. 이 토큰string을 FCM 콘솔에서 등록해줄 것이다.
didReceivRegistrationToken() : 토큰이 업데이트될때마다 실행된다. 여기서 새로운 토큰을 확인할 수 있다.
여기까지 진행하고 빌드를 하면, Xcode 콘솔 창에서 드디어 FCM 등록 토큰을 얻을 수 있다. 이제 이 고유한 디바이스 토큰을 파이어베이스 콘솔에서 등록해주자.
8. FCM 등록토큰을 이용하여 기기를 등록하고, 알림 테스트하기
아래처럼 Cloud Messaging으로 들어가서 알림 제목, 텍스트를 디자인할 수 있다. 테스트 메시지 전송 버튼을 누르면 기기를 등록하라고 나오는데, 여기에 FCM 등록 토큰을 입력해주면 된다. 그러고 테스트 버튼을 누르면 알림이 전송된다.

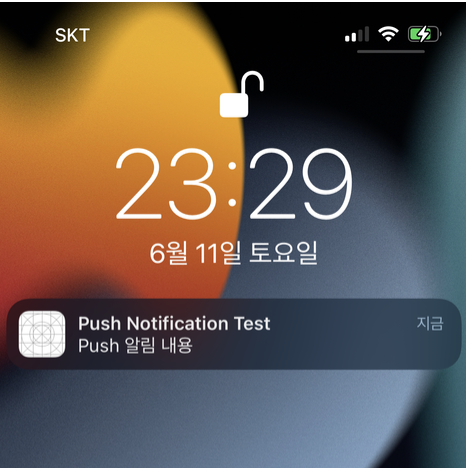
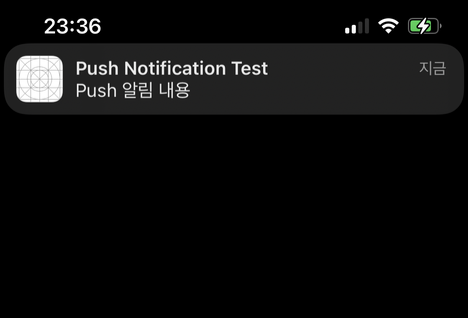
아래와 같이 Foreground와 Background에서 알림이 잘 작동하고 있다.
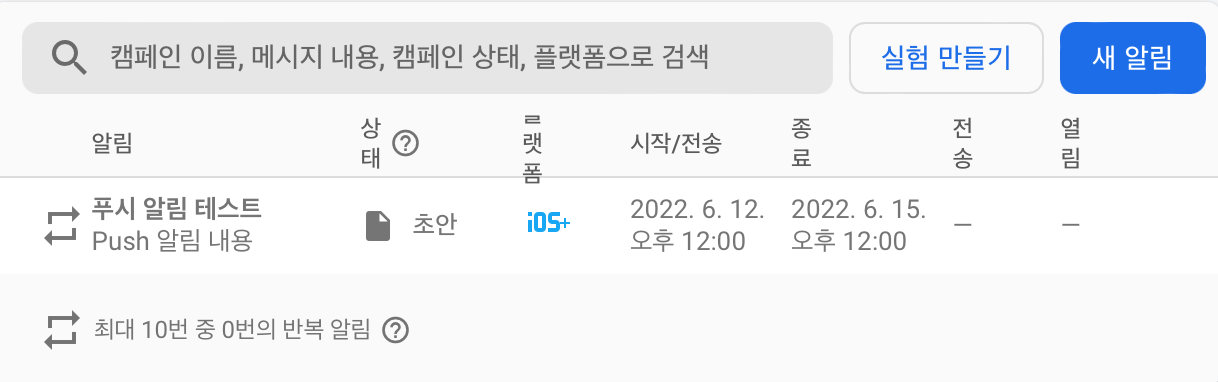
FCM 콘솔에서는 아래와 같이 타겟과 예약 등 알림에 대한 다양한 커스텀을 제공하고 있다.
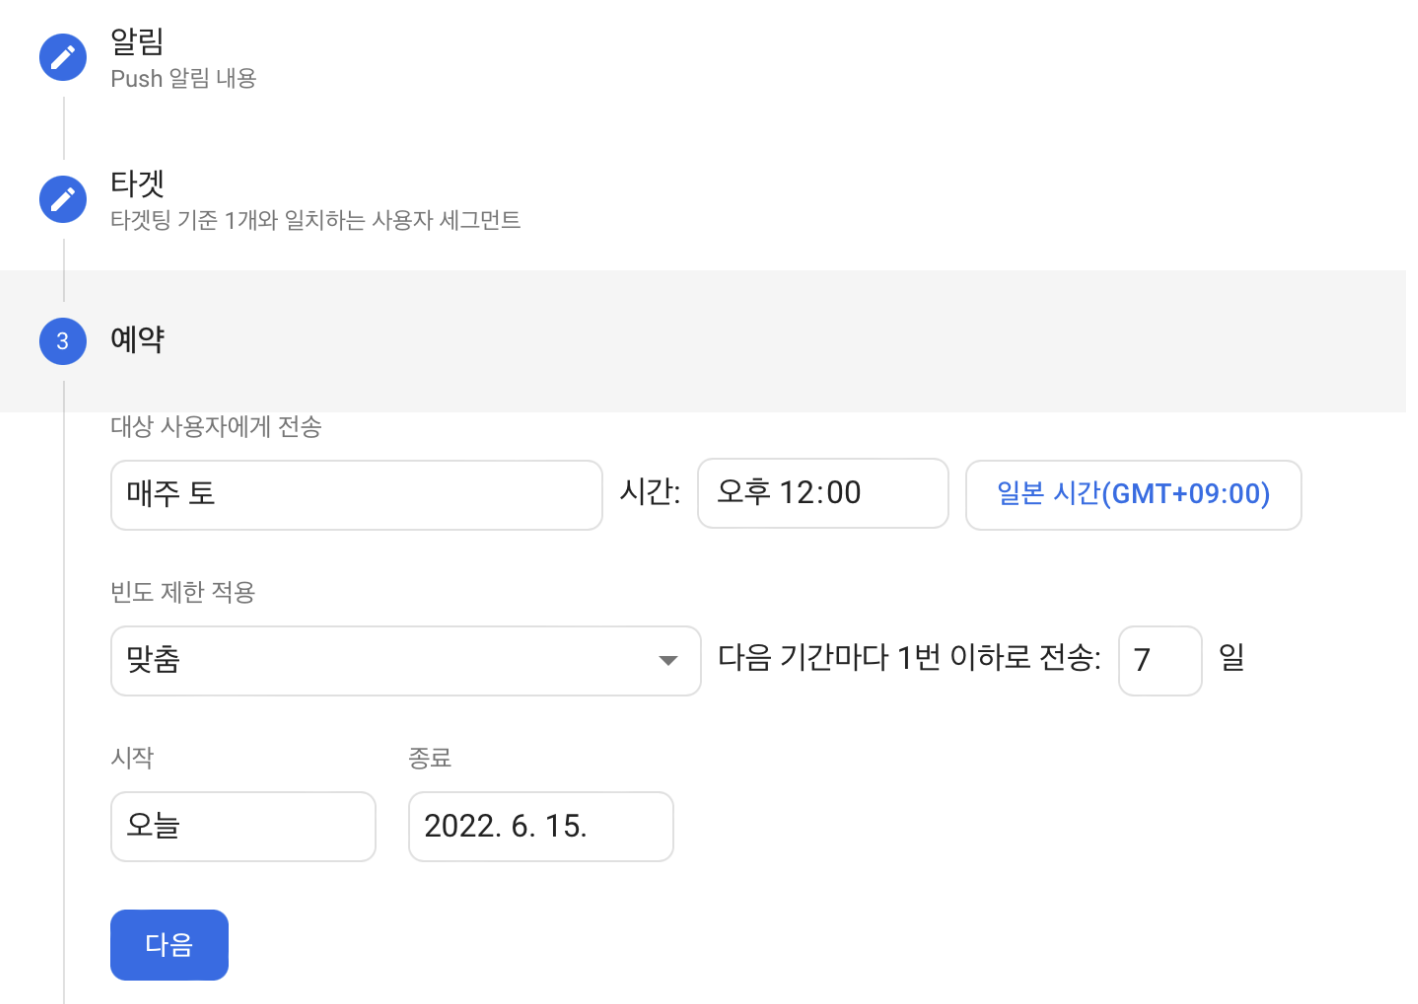
이렇게 만들어진 알림은 아래와 같은 형태로 관리된다.